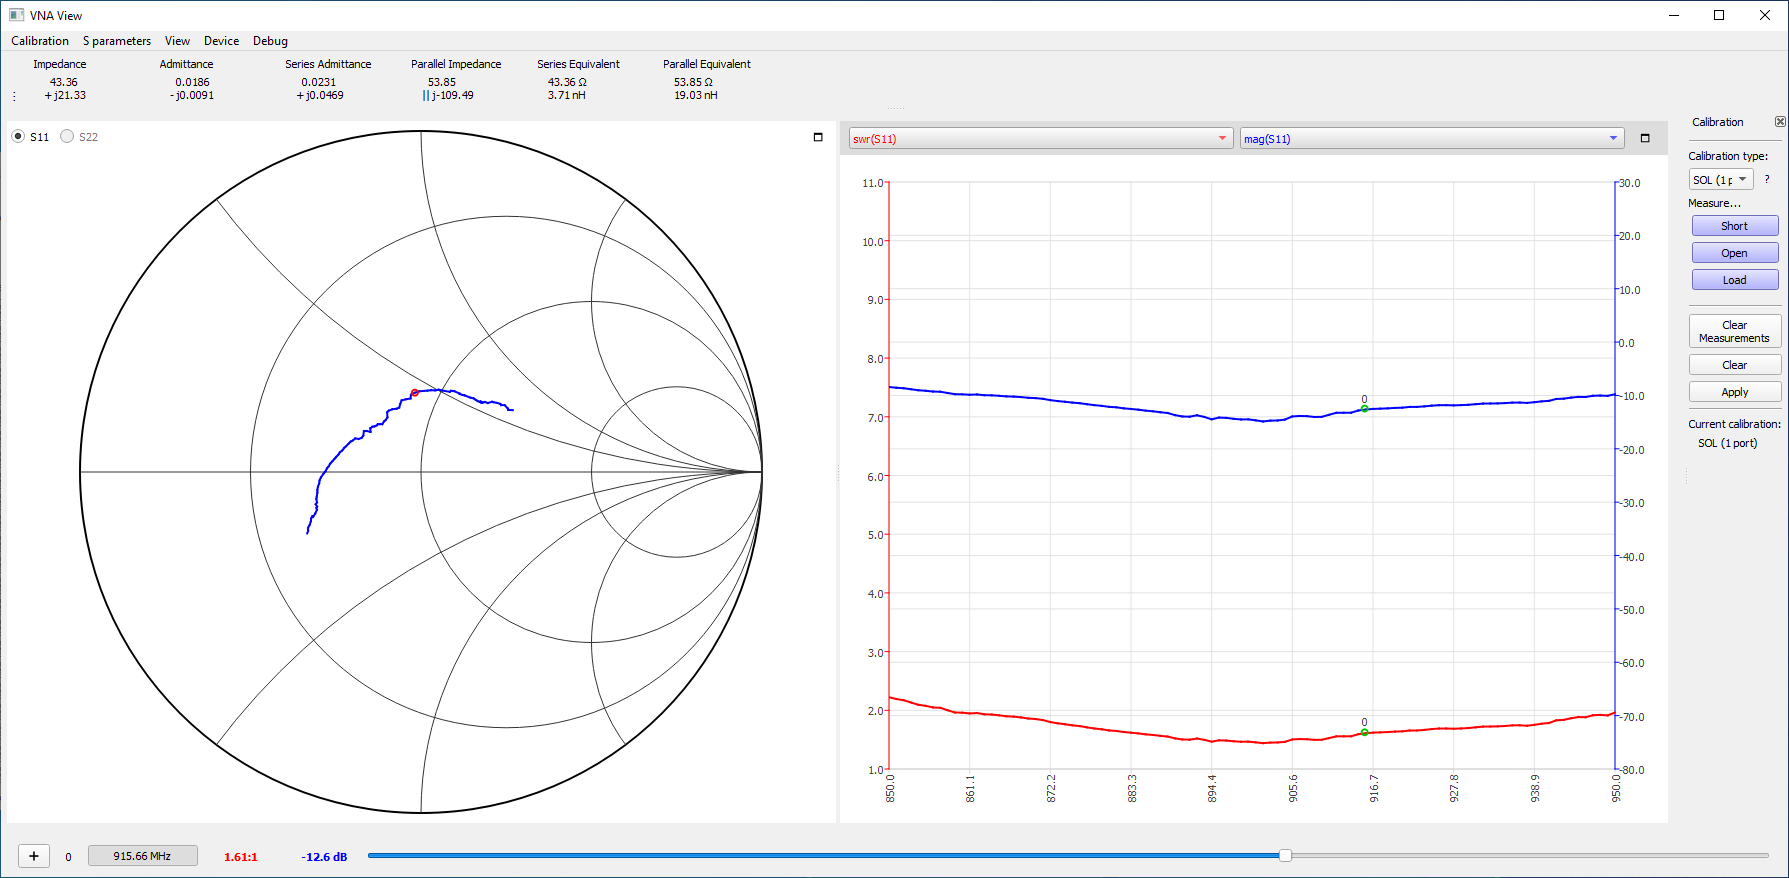
I calibrated my VNA with the test lead in my intended case in the position I want my home made dipole antenna to be. Then i started trimming the dipole ends and trying different bends within the case. Each change I put the front of the case back on and held it up from the desk a bit.
Yep. And with two high capacity batteries it should last a few days even with poor solar charging.
I’ve been doing a lot of hunting and experimentation to find an affordable combination of off the shelf parts to make relatively inexpensive repeaters.
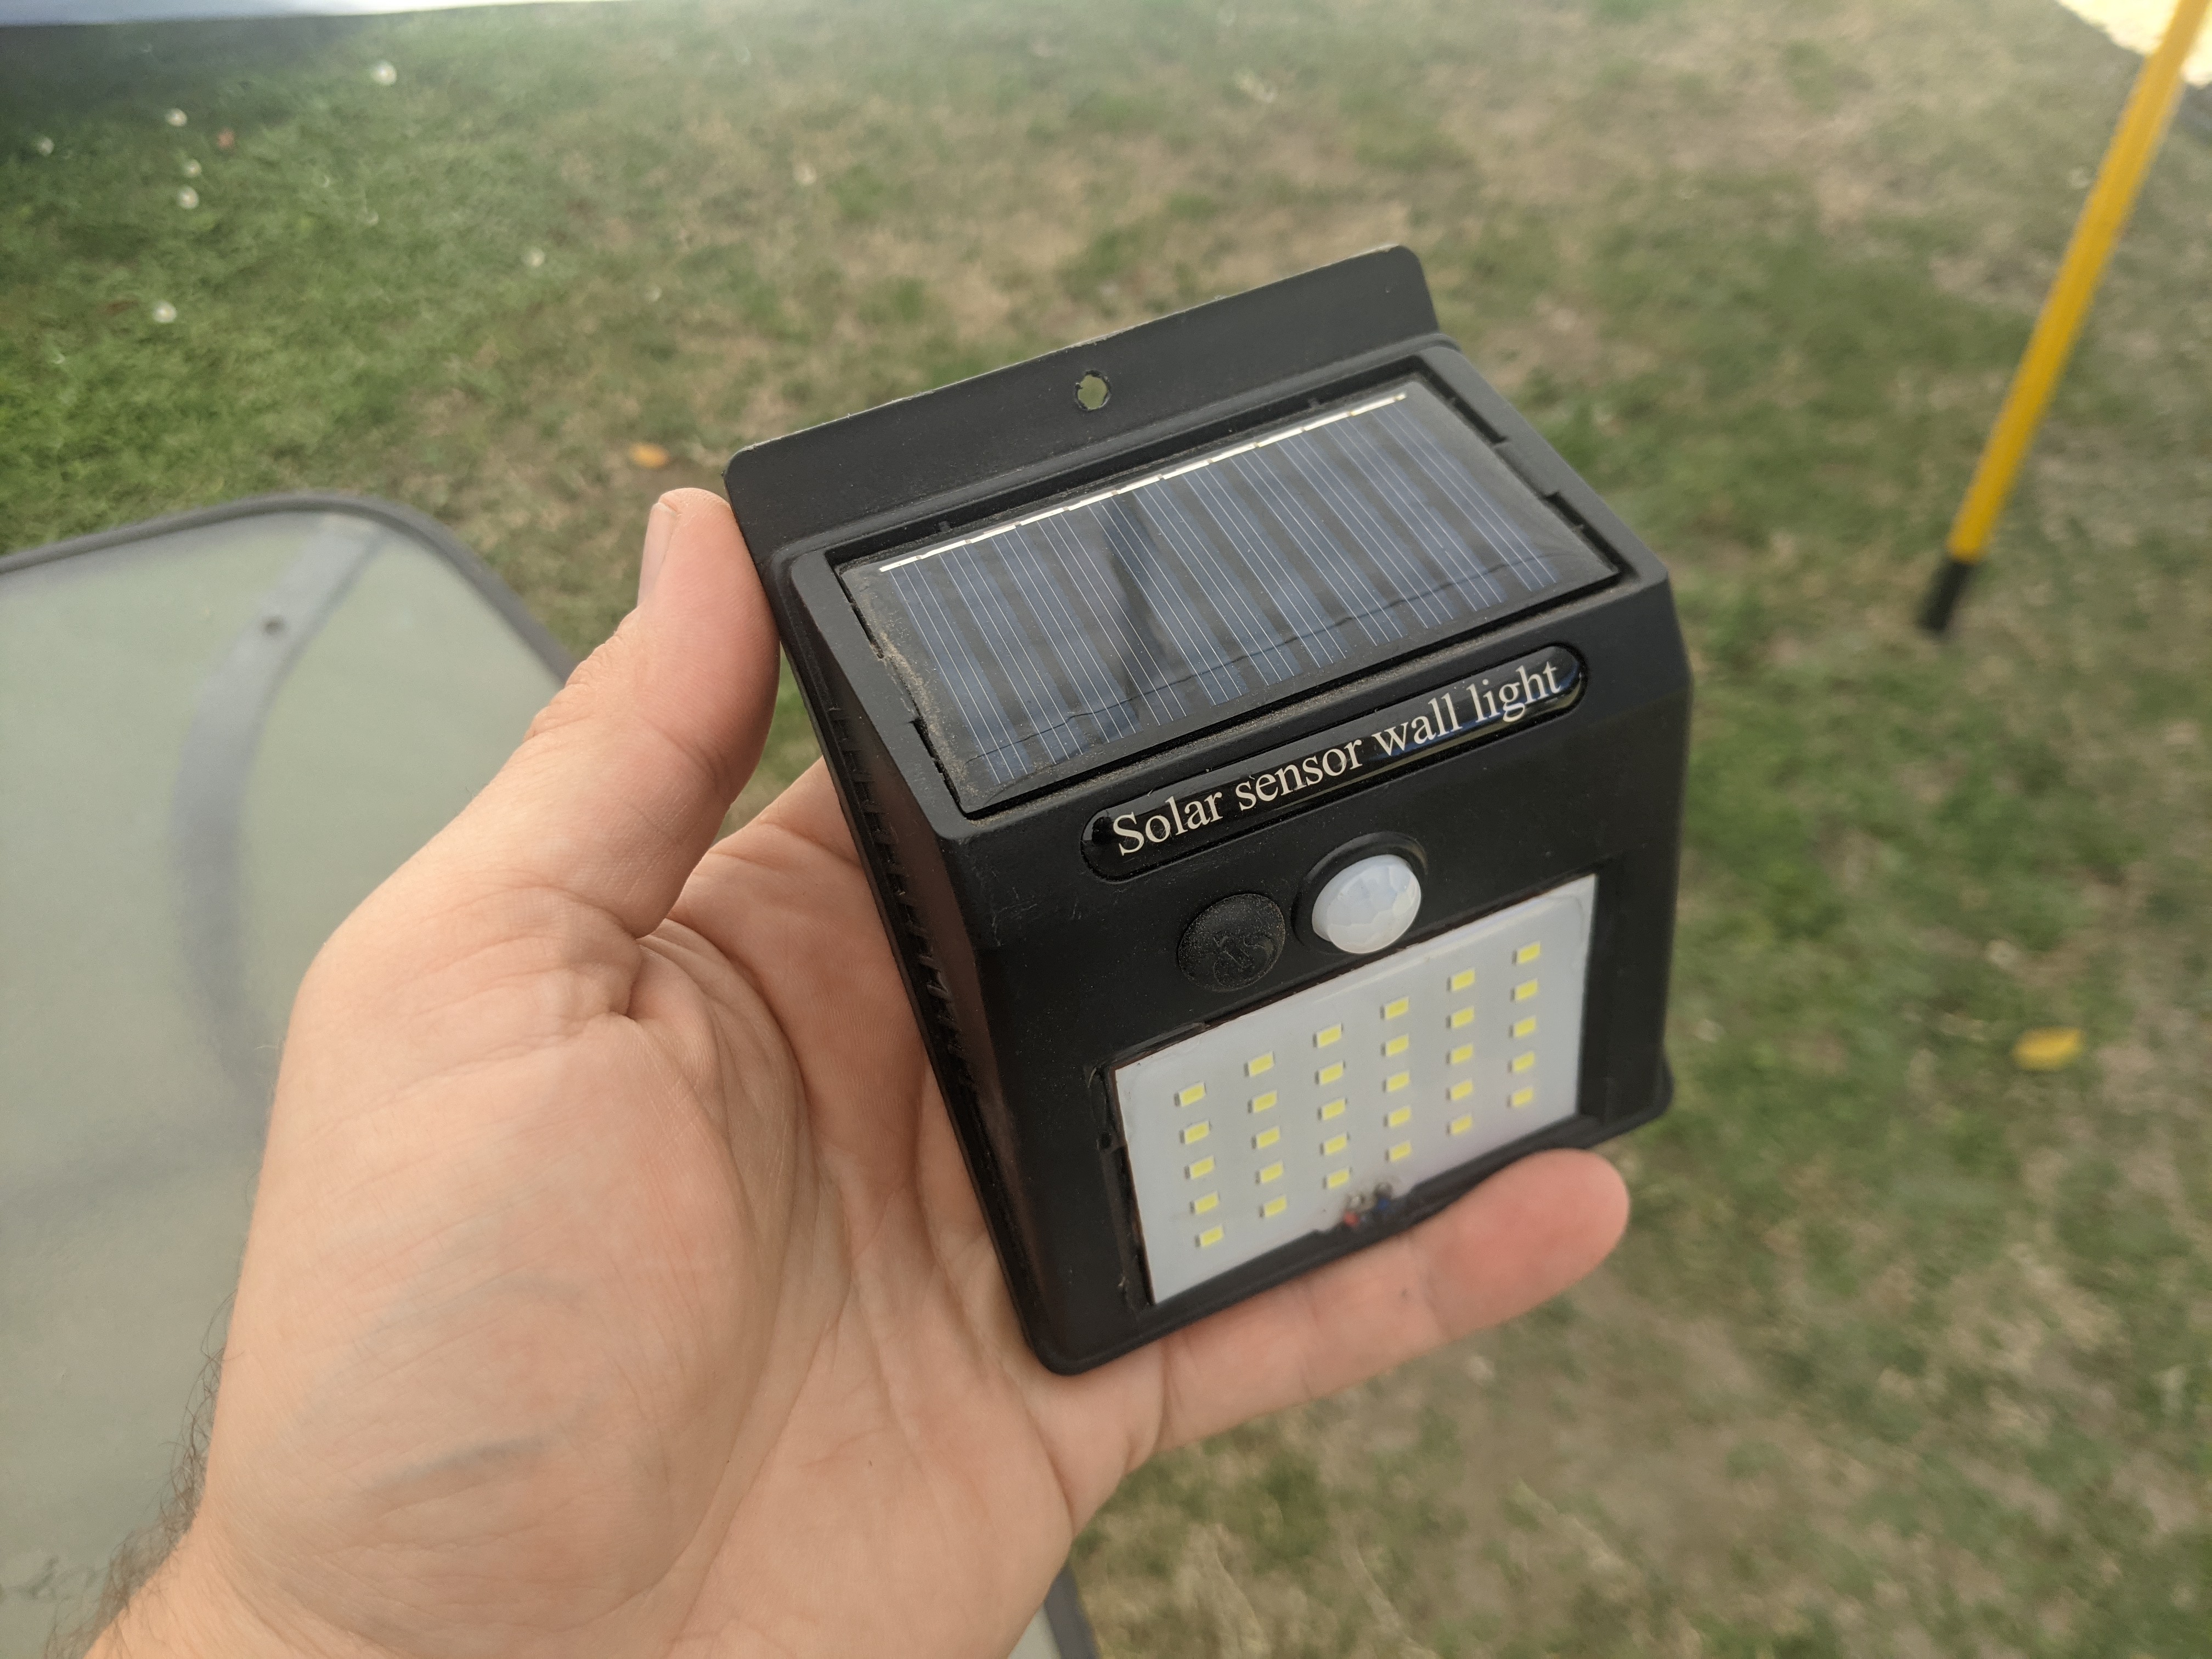
Just to document what I’ve done, food for thought for others… I tried installing a T-Beam in the solar light shown below and then just piggybacking off the 18650 and charge circuit that was already in there. I also tried feeding it through the TP4056 USB Charger, but in both cases, the solar panel could not keep up with charging, in the full Mexican sun.
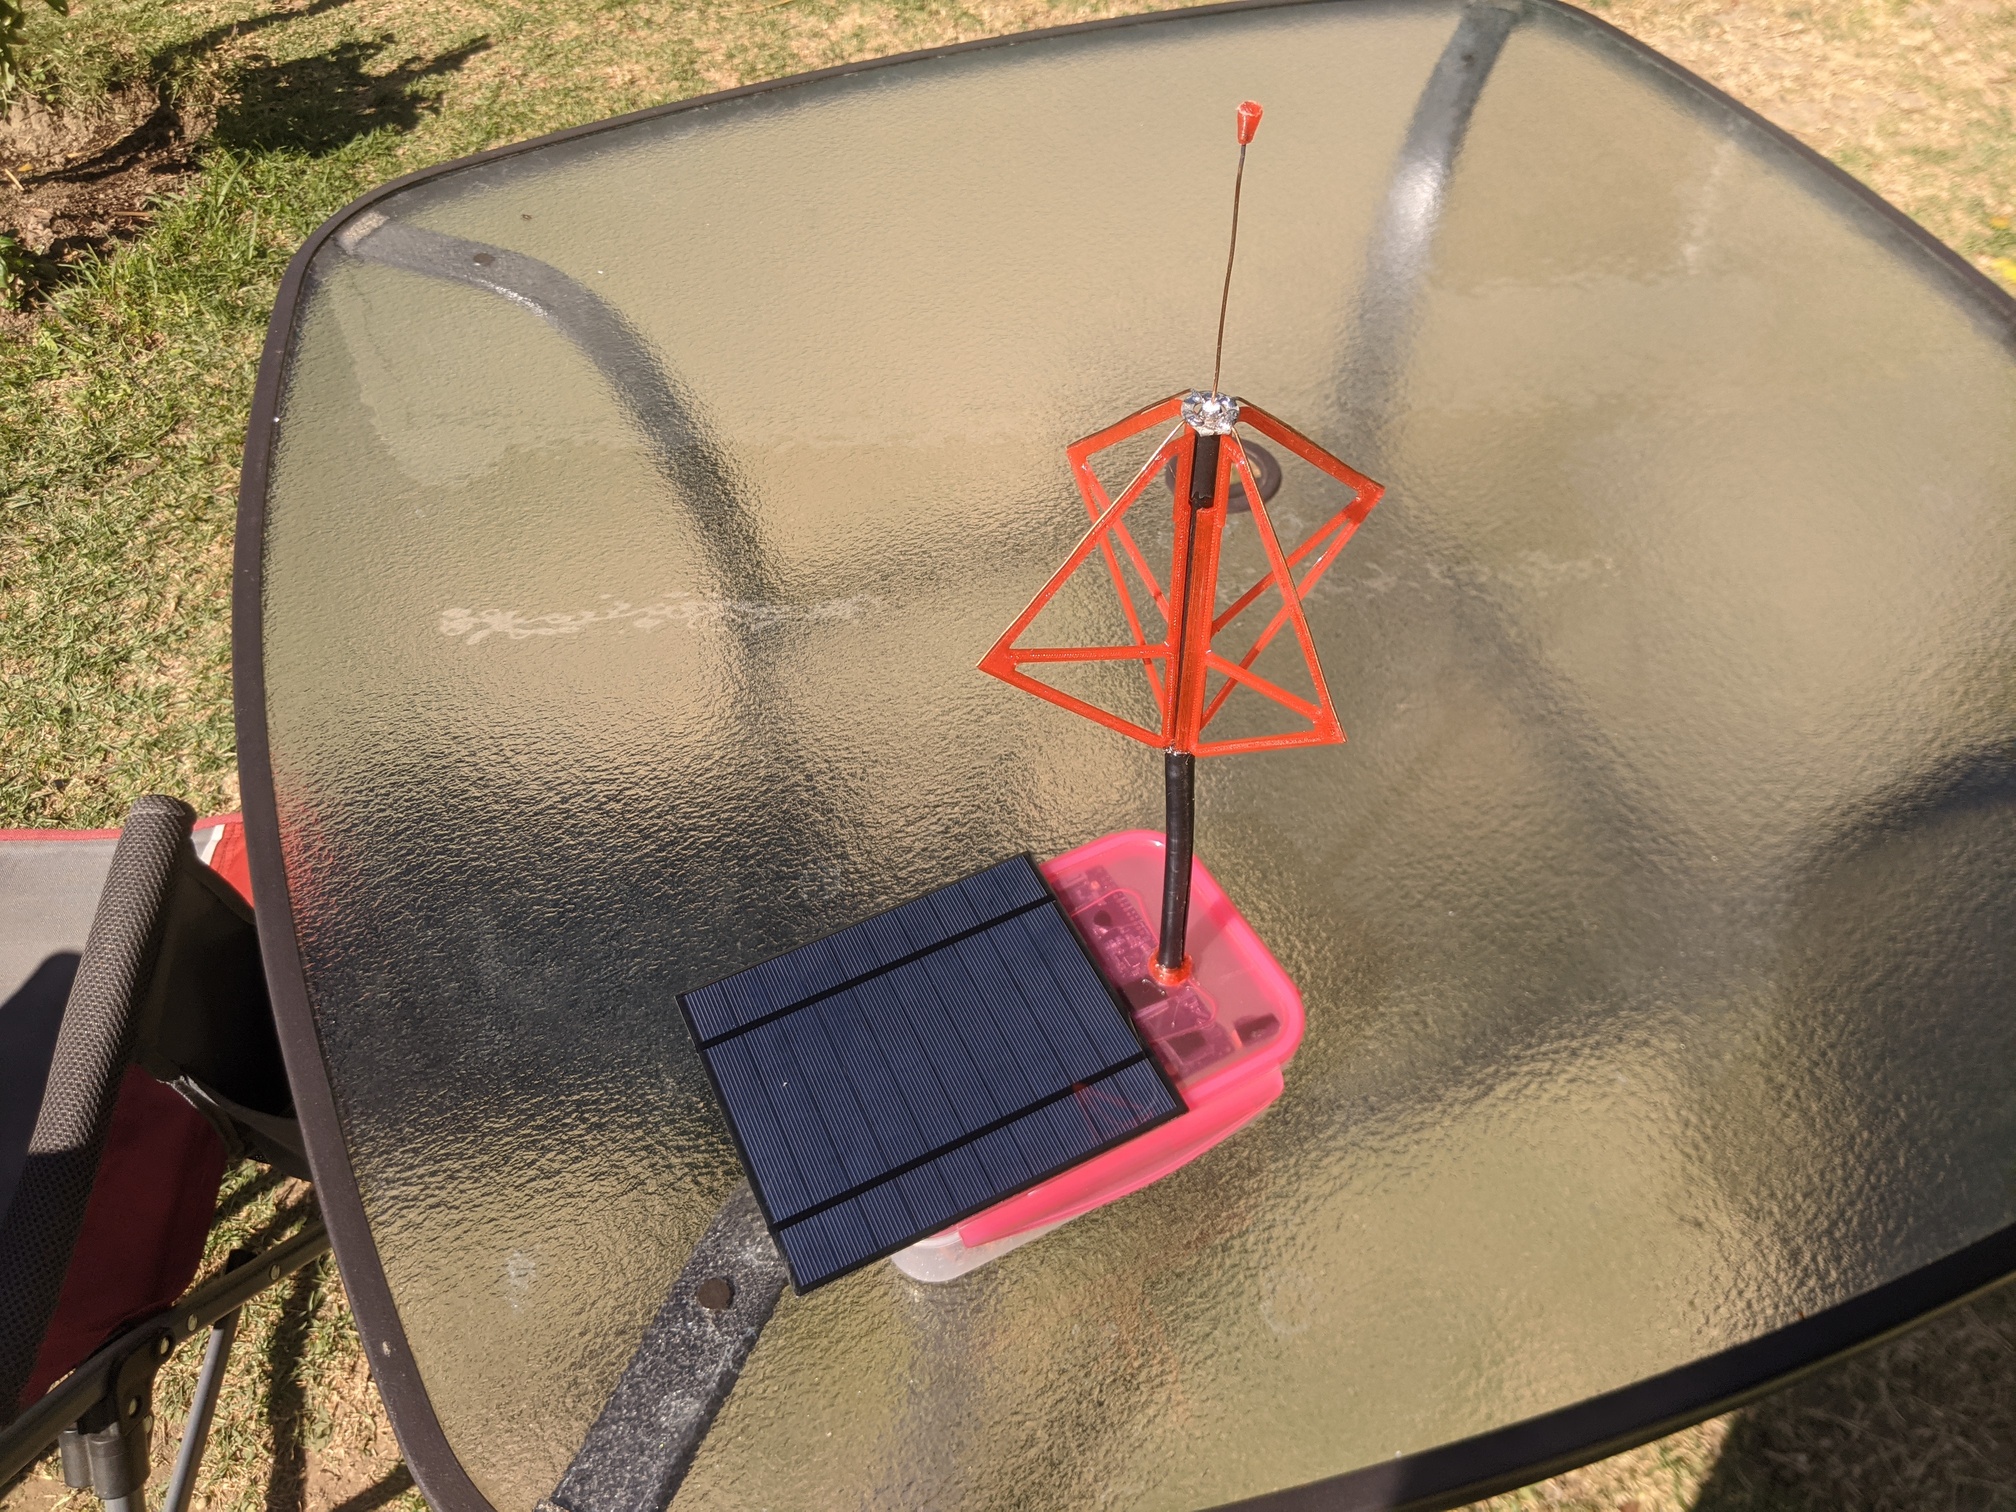
I then ordered the 2.5W panels shown below and fed it through the same TP4065 charger and it works perfectly, charging at 400mA. I’ve just put everything into a locking food container, VHB’ed the panel to the lid and made a 1/4 wave antenna from a stub of coax cable and a crimp on eyelet. 3D printed supports for the radials to keep them at 45 degrees and guide the drone lifting harness away after it’s been deployed…
By using the TP4056 it charges the battery and switches the output on to the T-Beam, if the voltage ever goes low, it will cut the load until the battery is above the lower threshold.
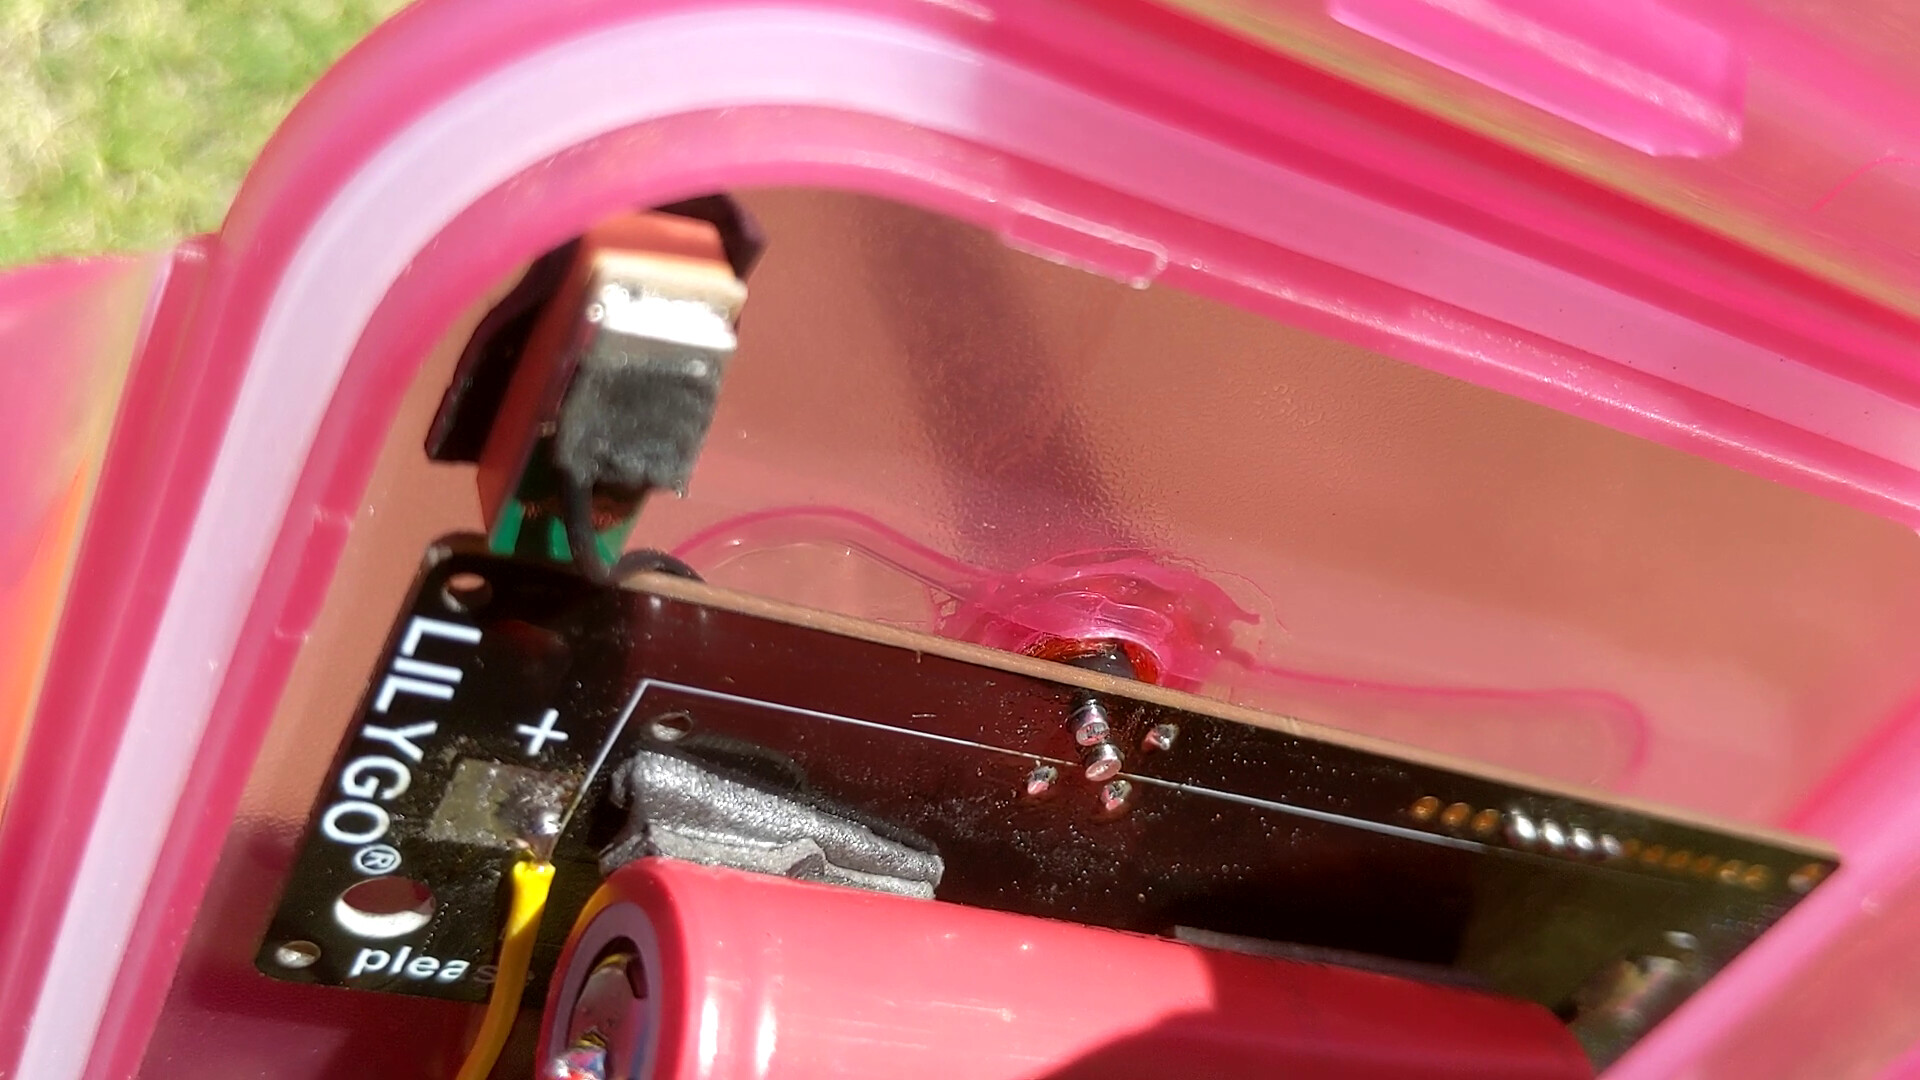
wow, very nice. I’ve been wanting a 3d printer for a very long time. I may just go for it. I settled on dipoles because I didn’t have any good ideas for supporting home made antennas outside the case. Can you provide a close up of your antenna feed point? What coax did you use? Do you think the top of you case is strong enough to not crack if there is some wind load on the antenna?
I made the antenna with about 30cm of RG6 Coax, I stripped the ends and gathered the braided shielding wire into 4 groups, then twisted and soldered them together.
Then I pinched the terminal over the shielding wires, soldered the 4 groups of shielding wire to the ring, soldered the 4 radials to the ring and trimmed all the wires to length. 77.9mm for the vertical monopole and 87.2 for the radials. This is for 915mhz, I later saw that it’s actually running at ~903Mhz so it could maybe have been better…
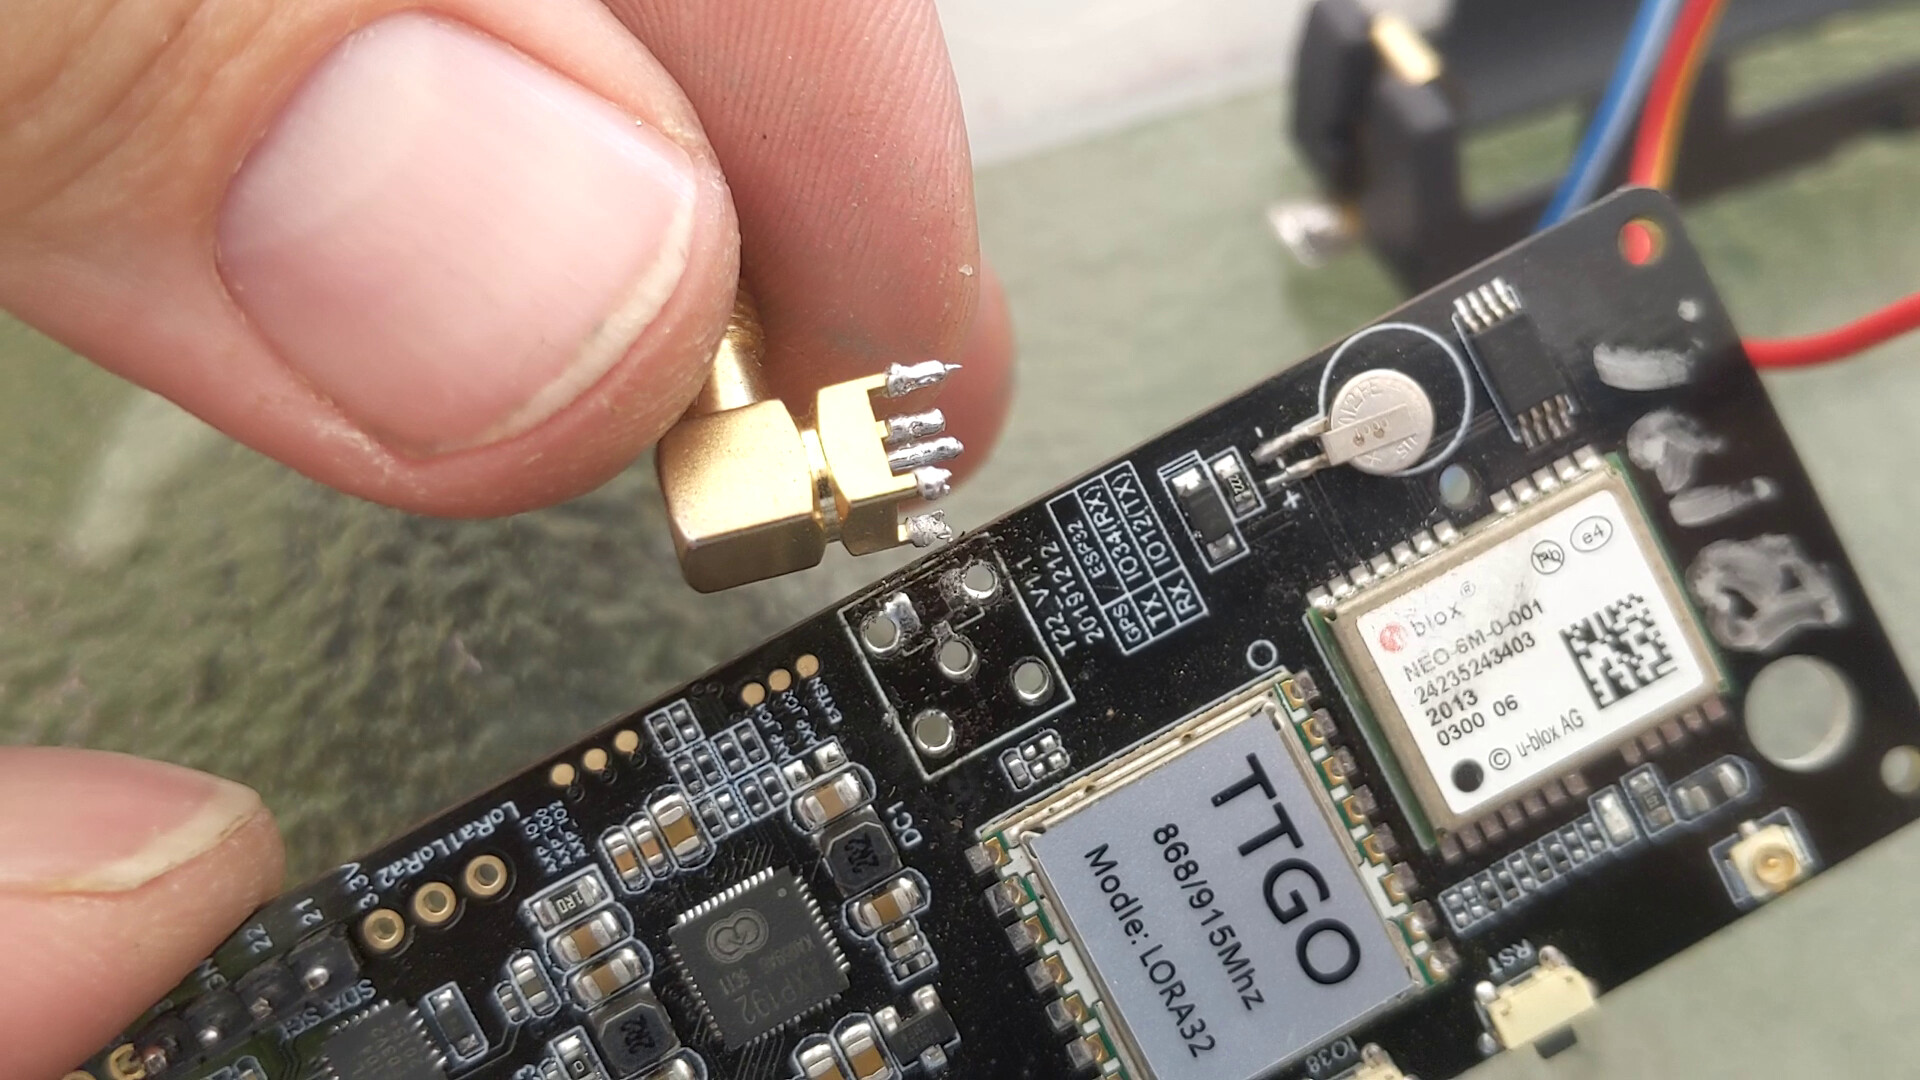
The T-Beam end of the coax is much the same, 4 groups of shielding wires the same as before, but they all point out axially, and then I removed the SMA connector from the board and soldered the coax directly.
To stiffen the wire so it stands upright, I took a piece of 3/8in nylon airbrake tubing and slit it lengthwise to get it over the coax, I could have maybe slid it on before if I’d thought of it before soldering the coax to the board.
I printed 2 half circles that pinch the coax and hold it tight when they are pressed into the hole in the box. I then sealed it up with E6000 glue. I put about 25% of a brick in the box for weight and we’ve had some decent winds down here lately, enough to tear off some tin roofs nearby, but the box is still sitting on the rooftop ledge where I dropped it off with the drone.
@Spor7biker Have you had any luck with those boards and getting it to go to low power? I tried setting router mode, but it’s always ‘USB’ even when using the pigtail to the battery. Consequently the screen never turns off and eats the battery pretty quickly.
I have 3 of the t-beams too, but I was trying to fit it into a smaller space (also a solar light). I may just make these into always powered nodes here at the house.
I haven’t actually tried , and your right the screen is always on. I’ve been busy with other projects so it hasn’t been a priority. If there is anything I can do to help test jest let me know.
My screen broke on my TLora, but I do recal it showed plugged in even powered throught the battery port. I ended up using a heat gun with some pinched pipe to focus the heat on the display and removed it.
The OLED isn’t causing the high power consumption though. They run pretty lean. It’s the fact that it’s not going into light-sleep mode, where everything but the radio is turned off. If the ESP32 w/ BLE or Wifi stays on, that’s going to be the bulk of the power draw. The OLED staying on is a symptom of the problem rather than the cause of it.
I just checked the meshtastic code for the tlora v1. I don’t see that we’re checking for the presence of a battery. That would explain why you recall it plugged in even though powered by battery port.
If you can find what pin is used by the ADC, I can enable it in the firmware. Just open a git feature request when you find it and I’ll make the change for you.
I was digging through the Q&A portion of the product page and they claim there is no battery sense line hooked up. With that said, I don’t think it’s worth investigating further.
I am measuring ~0.25W idle power draw. Using this handy calculator BatteryStuff Tools | Solar Calculator I could probably do 4 18650s and a 5 watt solar panel to keep the node up indefinitely with 5 days backup.